Appearance
Skip to content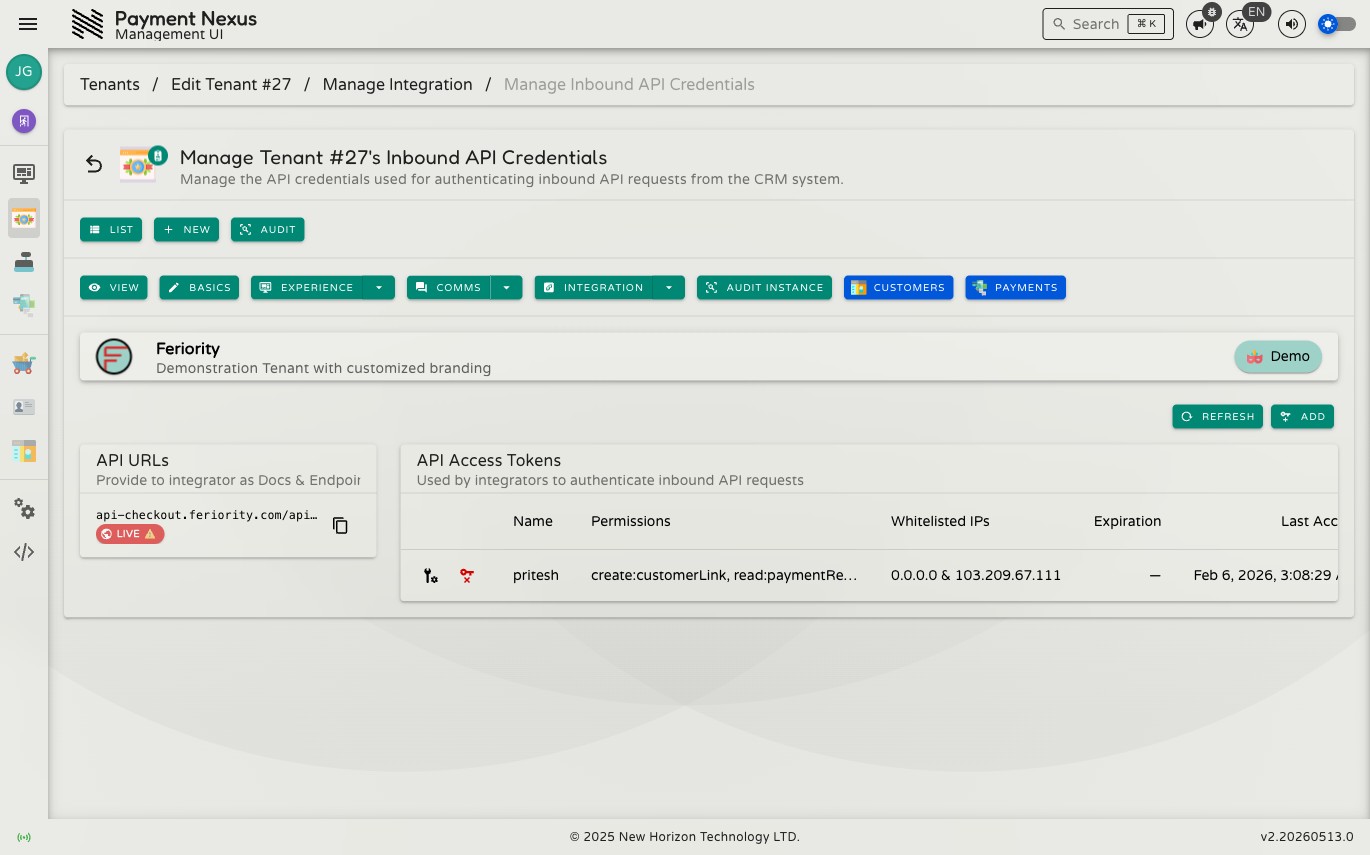
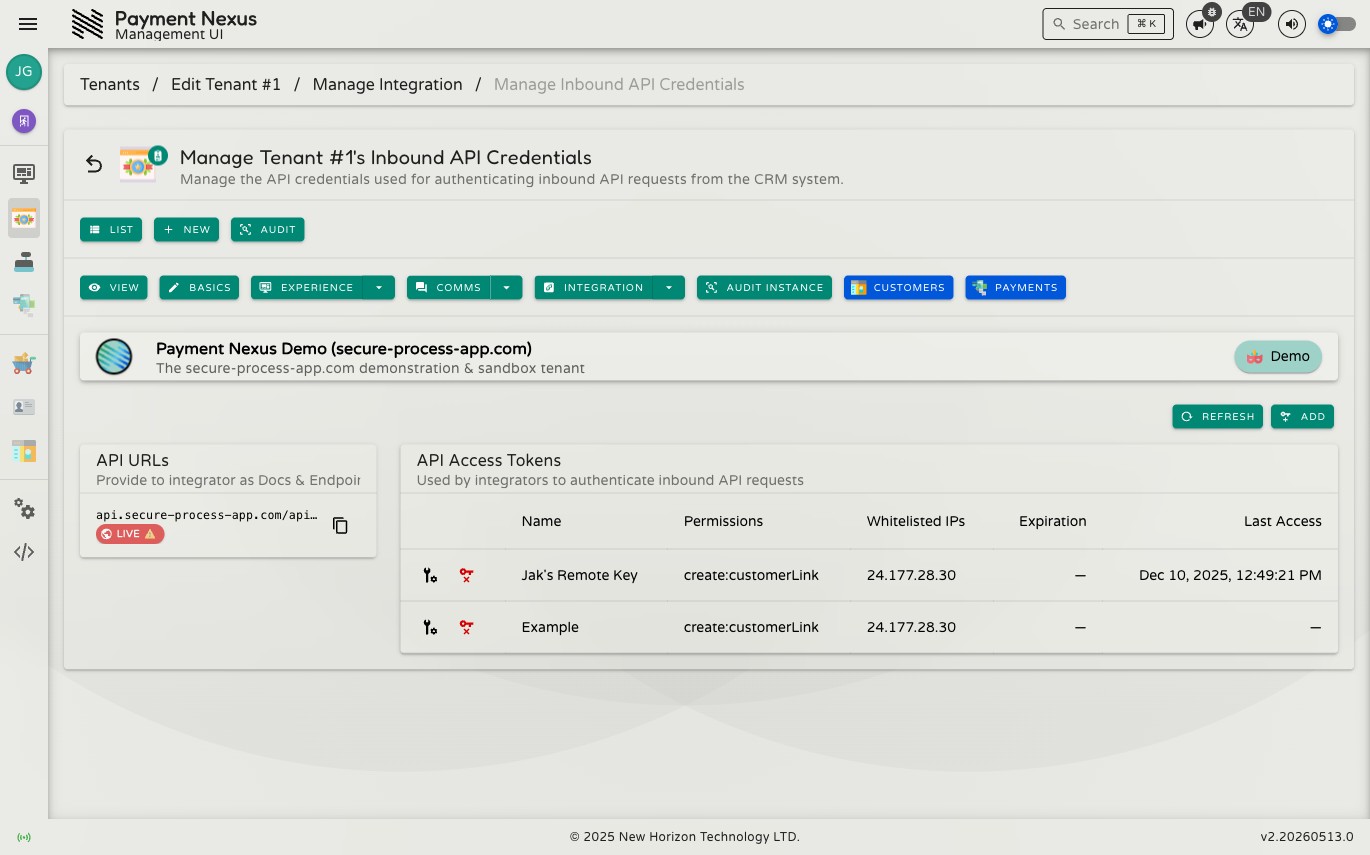
Inbound API Credentials
Inbound API Credentials manages the access tokens that the brand's CRM vendor uses to authenticate calls it makes into Payment Nexus. These are not credentials for Payment Nexus to call outward — they are credentials the CRM vendor holds and sends with each inbound request.
The page has two panels: API URLs on the left, and API Access Tokens on the right.
Permissions
| Action | Permission required |
|---|---|
| Manage inbound API credentials | tenant:manage:api:credentials |
API URLs panel
The left panel lists every domain configured for this brand, showing the full CRM API base URL alongside a Live or Sandbox badge. Each entry is labelled Provide to integrator as Docs & Endpoint — this URL serves double duty: it is both the base URL for all CRM API calls and the address of the brand's interactive API documentation.
Each entry has a copy button.
API documentation
Visiting the URL in a browser opens the brand's interactive API documentation — an OpenAPI reference generated automatically for this brand, with the correct server URL pre-filled.

Give this URL to the CRM vendor team who is integrating with this brand. It is the single reference they need: available endpoints, authentication requirements, request and response schemas, and — critically — the Webhook Event Payload schema, which defines the structure of the JSON body that Payment Nexus sends to the CRM vendor's own webhook endpoint when payment events occur.

The documentation is also available in machine-readable formats for CRM vendor teams who want to generate client code or import the spec into their own tooling:
| Format | URL suffix |
|---|---|
| Interactive HTML (default) | /api/integration/crm/ or /api/integration/crm/swagger |
| OpenAPI JSON | /api/integration/crm/openapi.json |
| OpenAPI YAML | /api/integration/crm/openapi.yaml |
All API calls require a bearer token in the Authorization header. See API Access Tokens below for how to create and manage those tokens.
API Access Tokens table
The right panel lists all access tokens created for this brand. Each row shows:
| Column | Description |
|---|---|
| Name | A label assigned at creation to identify who or what uses this token |
| Permissions | The actions this token is allowed to perform |
| Whitelisted IPs | The IP addresses or ranges from which this token may be used |
| Expiration | The date the token expires, or Never if no expiry was set |
| Last Access | When this token was last used to make a request |
Toolbar actions
| Action | Description |
|---|---|
| Refresh | Reloads the token list from the server |
| Add | Opens the form to create a new access token |
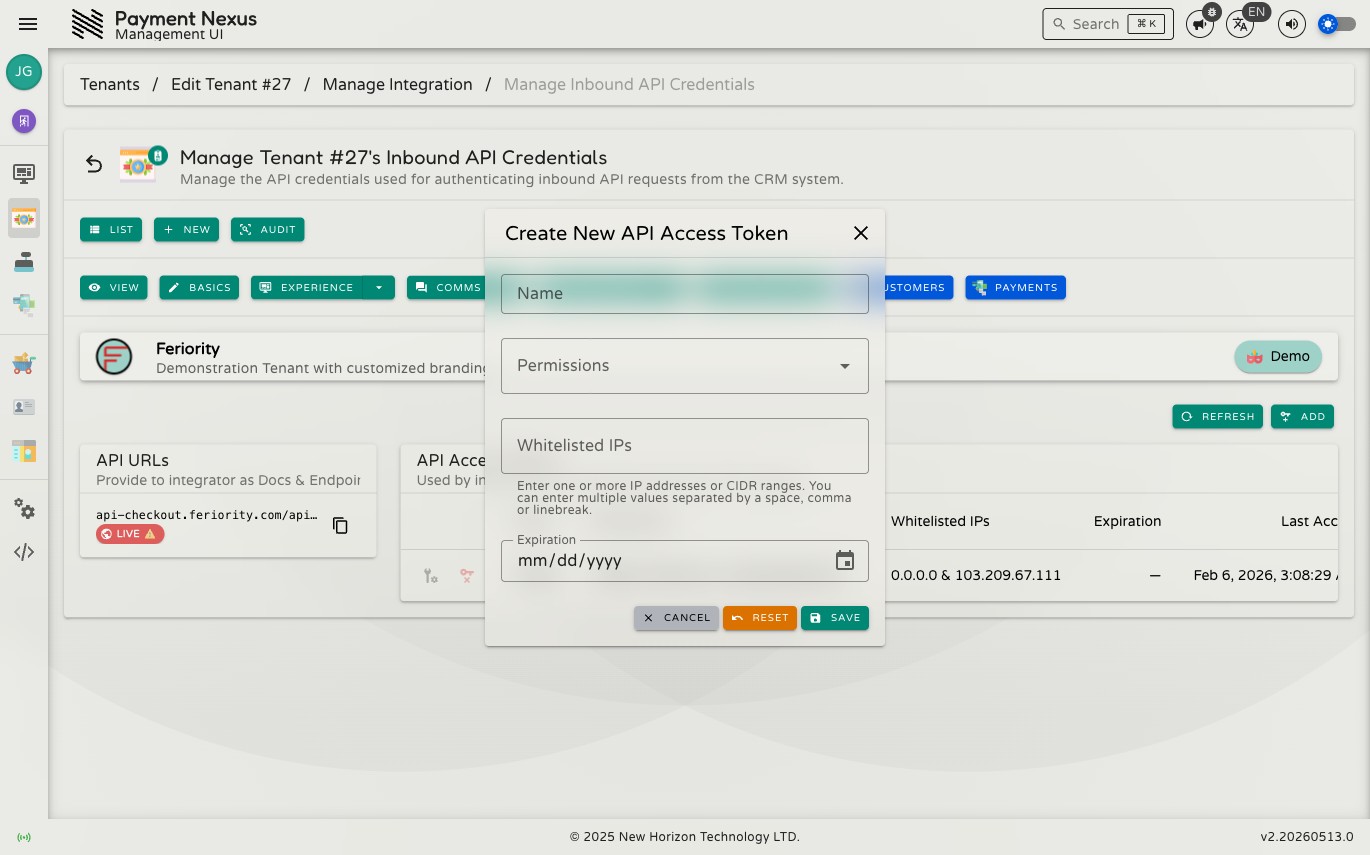
Adding a token
Click Add to open the creation form.
| Field | Required | Description |
|---|---|---|
| Name | Yes | A label to identify this token (minimum 3 characters) |
| Permissions | Yes | One or more actions to grant to this token — select from the available list |
| Whitelisted IPs | Yes | At least one IP address or CIDR range from which the token may be used |
| Expiration | No | An optional expiry date; if set, must be at least one day in the future |
WARNING
The token value is shown once only, immediately after creation. Copy it and store it somewhere secure before closing the dialog — it cannot be retrieved again.
After creation — copying the token
Once the token is created, a dialog appears showing the new token value. Use the Copy button to copy it to your clipboard. If you try to close this dialog before copying, you will be asked to confirm that you have already done so.
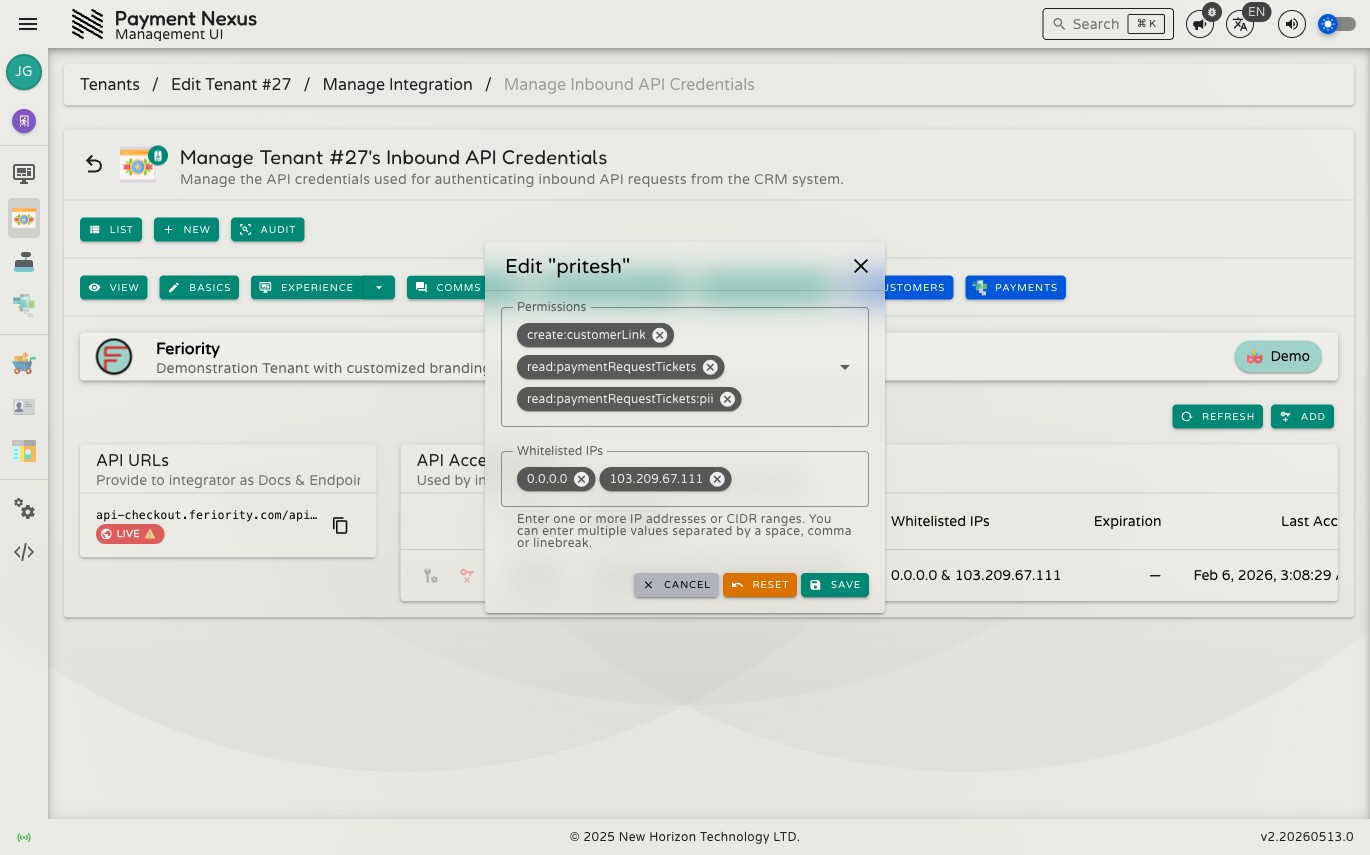
Editing a token
Click the edit button on any token row to update its permissions or whitelisted IPs. The token's name and expiration date cannot be changed after creation — if either needs to change, delete the token and create a new one.
Deleting a token
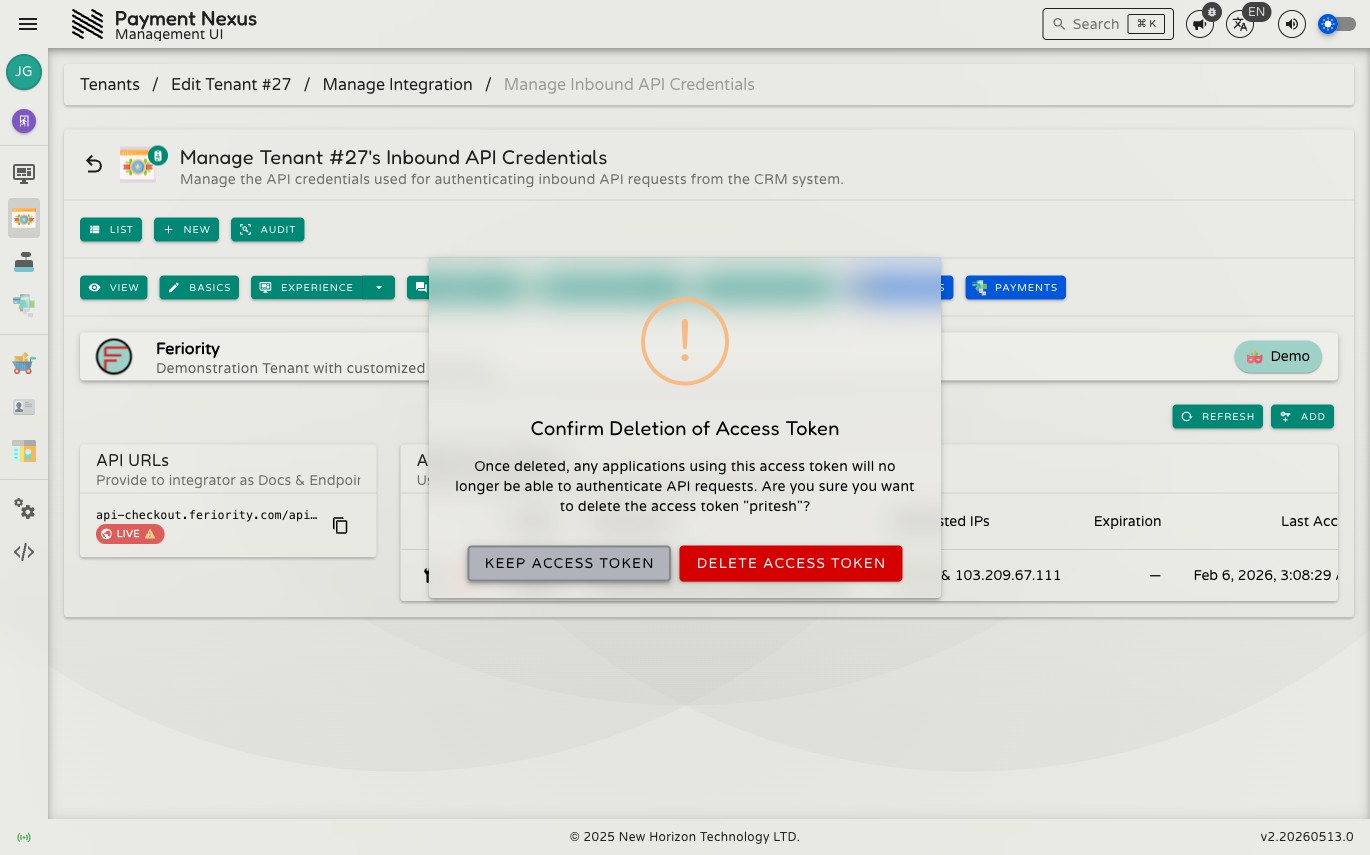
Click the delete button on any token row to remove it. A confirmation dialog shows the token name and warns that any system using the token will immediately lose access. Choose Delete Access Token to proceed or Keep Access Token to cancel.
WARNING
Deletion takes effect immediately and cannot be undone. The token value is permanently gone.