Appearance
Skip to content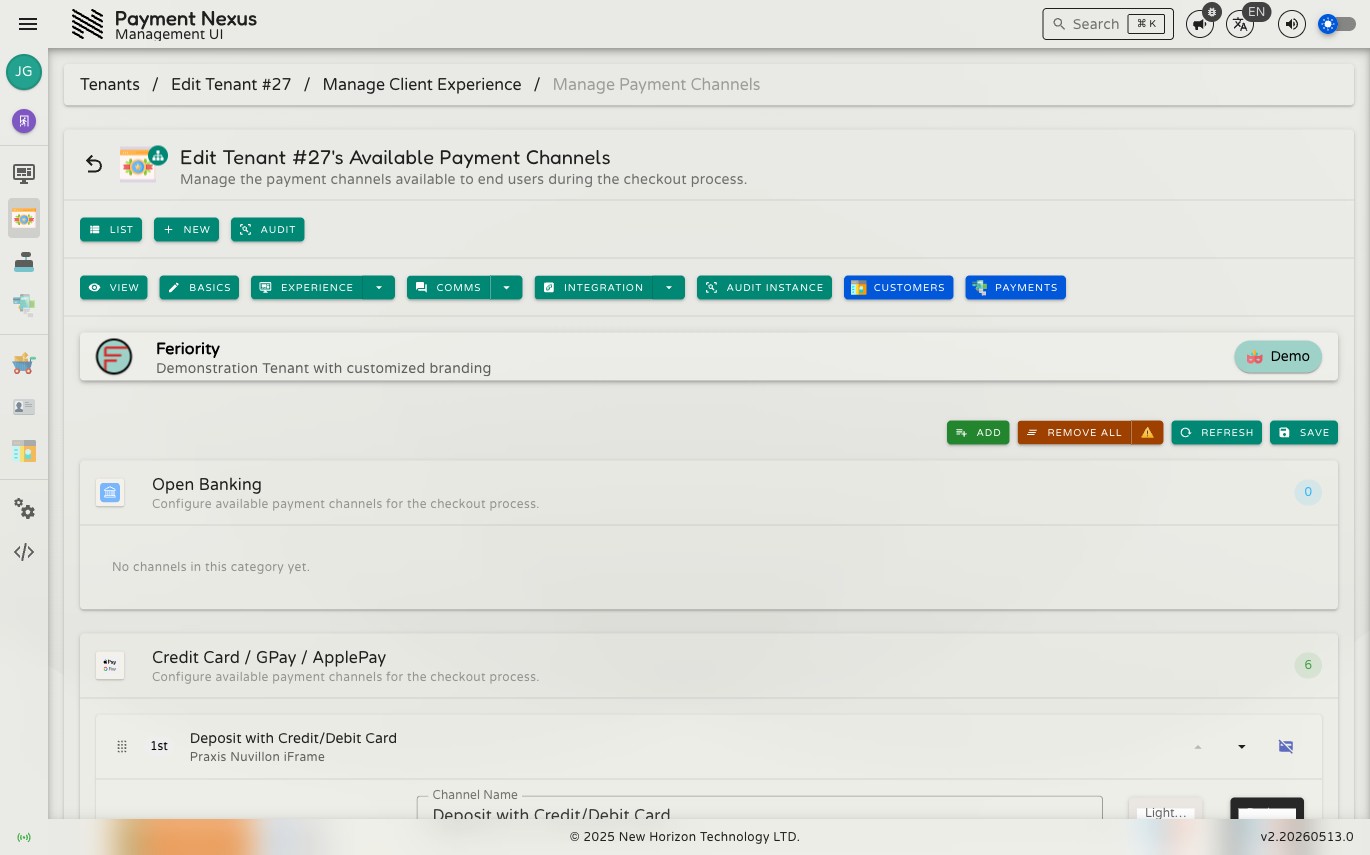


Payment Channels
Payment Channels is one of the most operationally critical pages in the system. It controls which payment methods are available to customers during checkout, the order they appear in, and how each is labelled and branded. Getting the channel configuration right directly affects conversion — wrong order, missing channel names, or misconfigured icons will affect every checkout session for this brand.
Permissions
| Action | Permission required |
|---|---|
| Edit payment channels | tenant:update:channels |
Toolbar actions
| Action | Color | Description |
|---|---|---|
| Add | Green | Open the channel picker to add new channels from configured PSPs |
| Remove All | Orange | Remove every channel from this brand in one step |
| Refresh | Blue | Re-fetch the latest channel and PSP data from the backend, discarding any unsaved changes |
| Save | Blue | Persist all staged changes — names, icons, and ordering |
WARNING
Remove All stages the removal of every channel at once. Until you click Save, no changes are committed — but if you do save, customers will see no payment options in checkout until channels are re-added and saved again. Use with care.
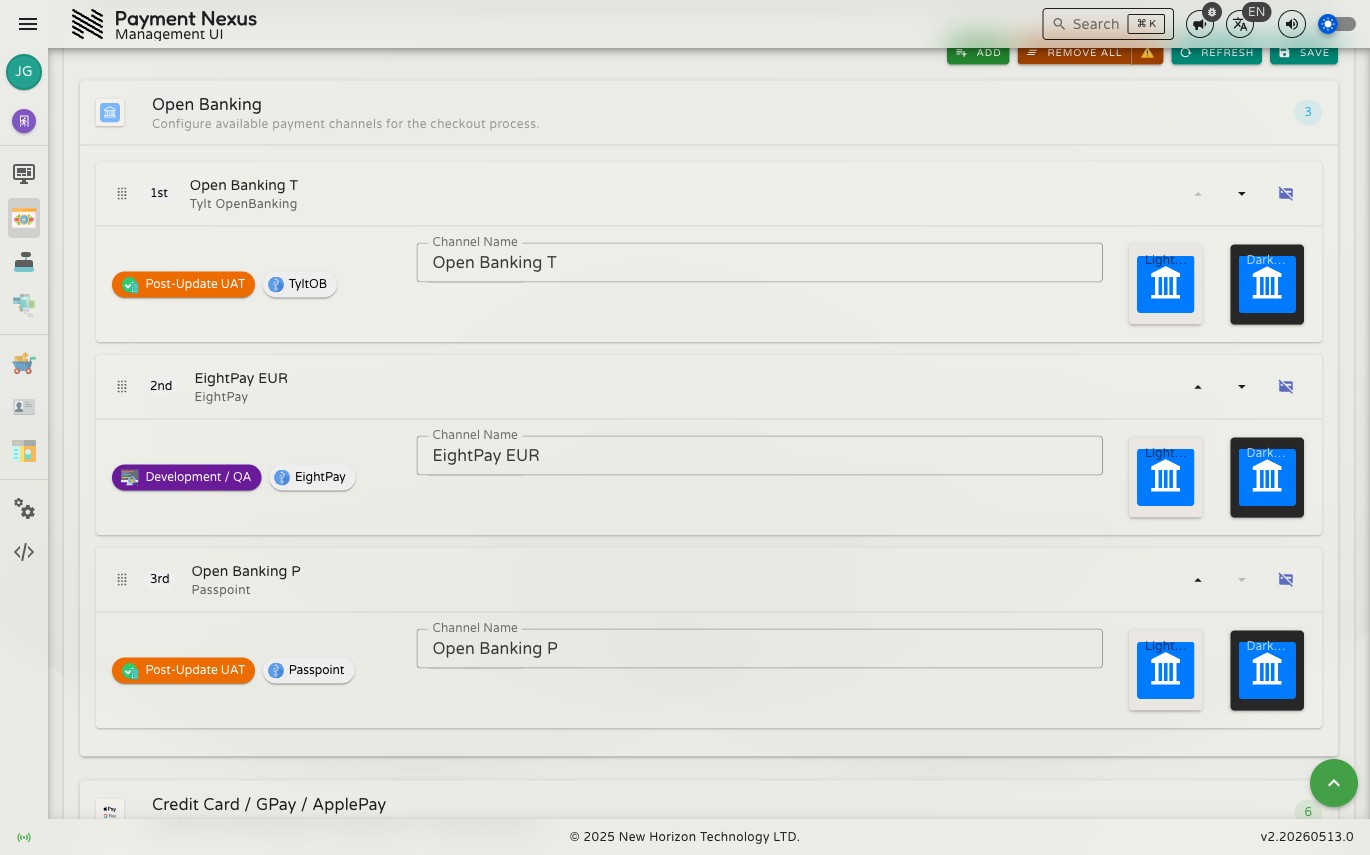
How channels are organised
Channels are grouped into four fixed categories, always displayed in this order:
| Category | Description |
|---|---|
| Open Banking | Bank transfer and open banking payment methods |
| Credit Card / GPay / ApplePay | Card-based and digital wallet methods |
| Crypto | Cryptocurrency deposit methods |
| Uncategorized | Channels whose PSP type is not mapped to a named category |
Each category header shows a count badge. If no channels have been added to a category, it shows an empty-state message. Channels cannot be moved between categories — the category is determined by the PSP channel type and is fixed.
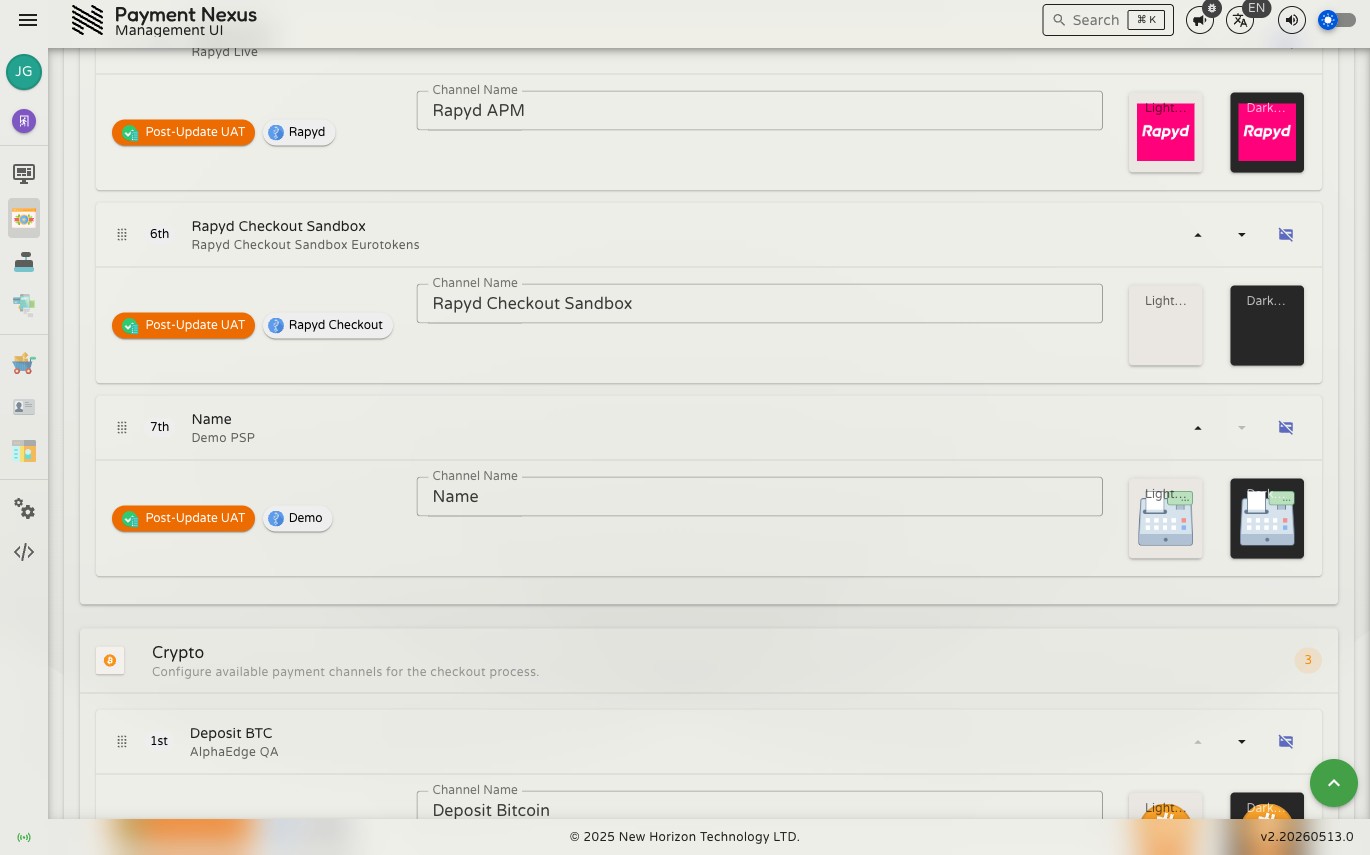
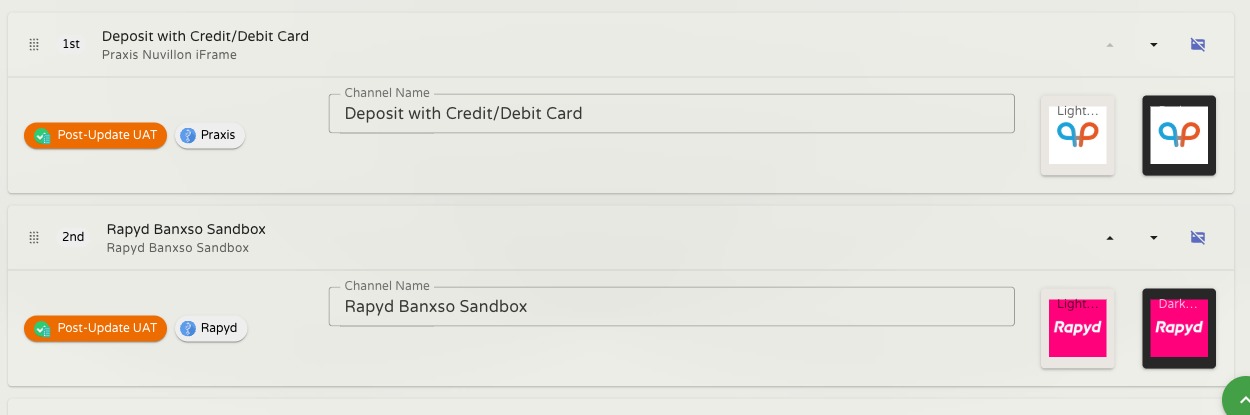
Channel card anatomy
Each channel is represented as a card. From left to right:
| Element | Description |
|---|---|
| Drag handle | The grip icon on the far left — drag this to reorder the channel within its category |
| Ordinal badge | Position within the category (1st, 2nd, 3rd…) — updates live as you reorder |
| PSP channel name | The payment method name as defined by the PSP (read-only) |
| PSP account name | The specific PSP account this channel comes from (read-only) |
| Release state badge | The release state of the PSP integration (e.g. Post-Update UAT, Production) |
| PSP vendor badge | The vendor framework for this PSP (e.g. Praxis, Rapyd, AlphaEdge) |
| Channel Name | Editable — the name shown to customers in checkout |
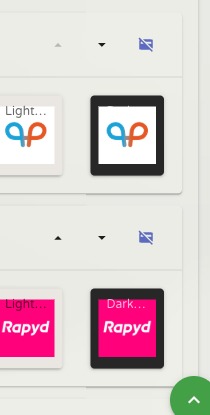
| Light Icon | Editable — square icon shown when checkout is in light theme |
| Dark Icon | Editable — square icon shown when checkout is in dark theme |
| Up / Down buttons | Reorder the channel one step at a time within its category |
| Remove button | Stage this channel for removal from the brand's checkout |
There is no per-channel enable or disable toggle — a channel is either present in the brand's channel list and visible in checkout, or it is removed from it entirely.
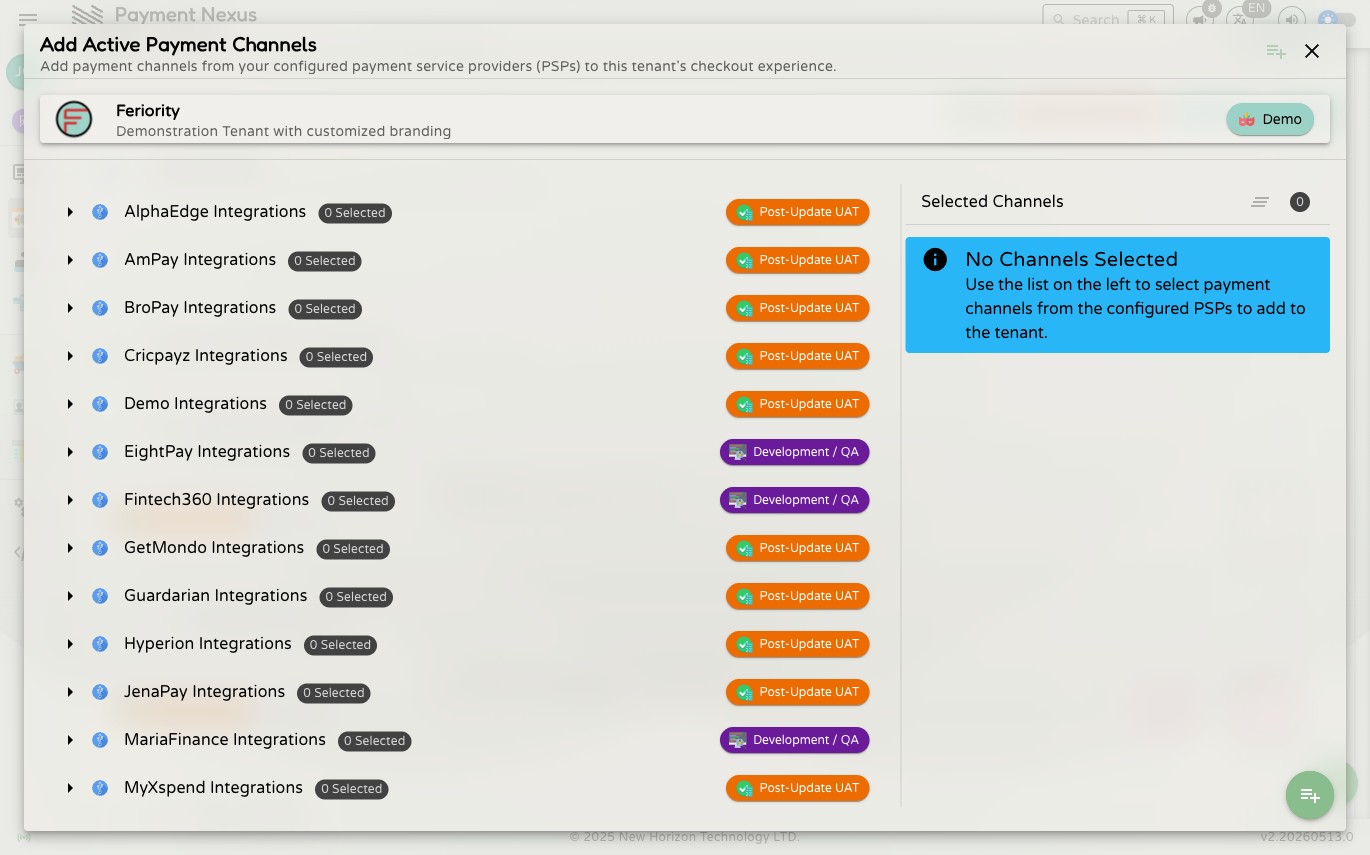
Adding channels
Channels can also be added in bulk across many brands at once from the PSP side — see Link to Tenants on the PSP view page. That approach adds every channel from a PSP to the selected brands in one operation; the steps below give you per-channel, per-brand control.
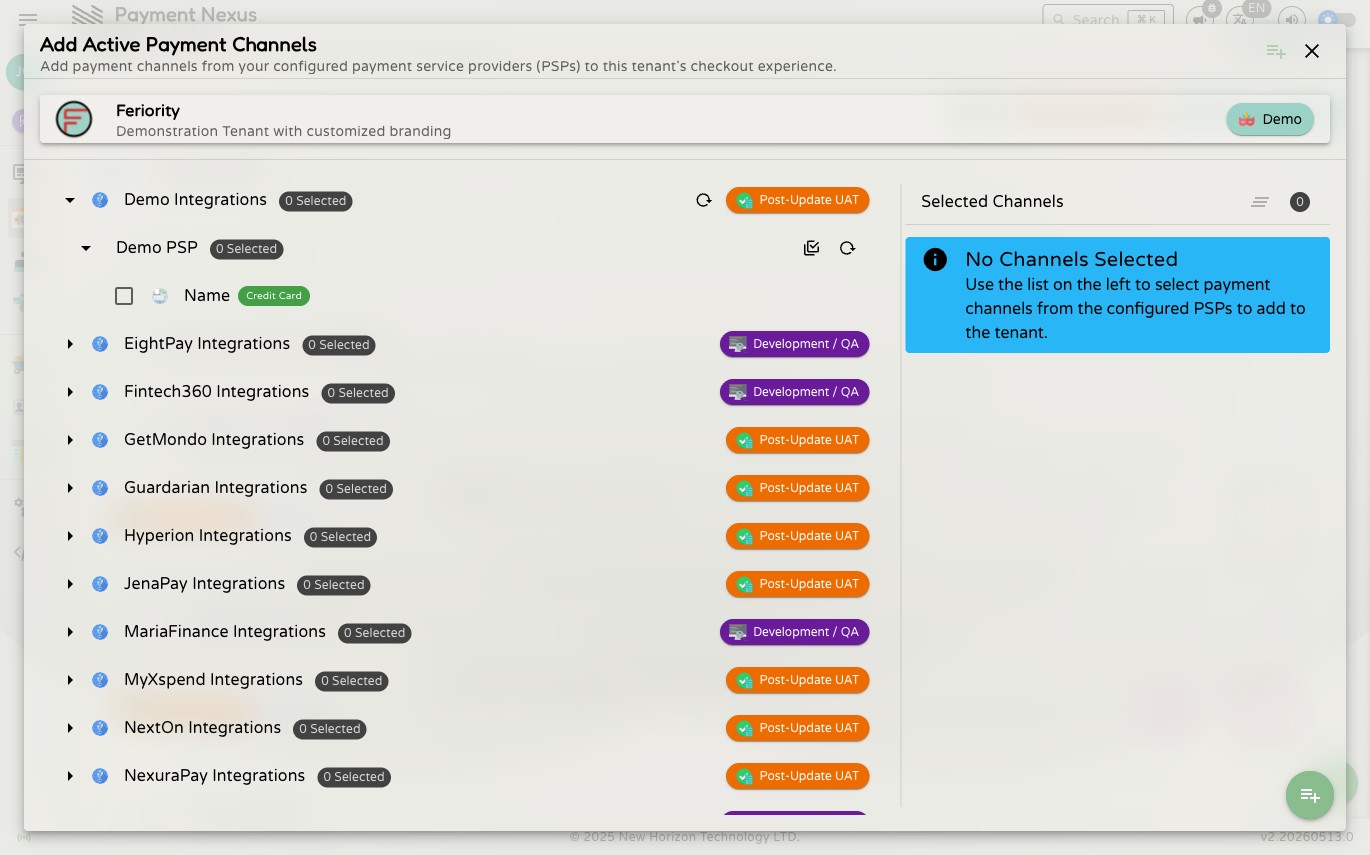
Step 1 — Open the picker
Click Add in the toolbar. The channel picker opens showing every PSP integration configured in this environment. Each integration shows a count of currently selected channels and its release state. The right panel shows "No Channels Selected" until you make a pick.
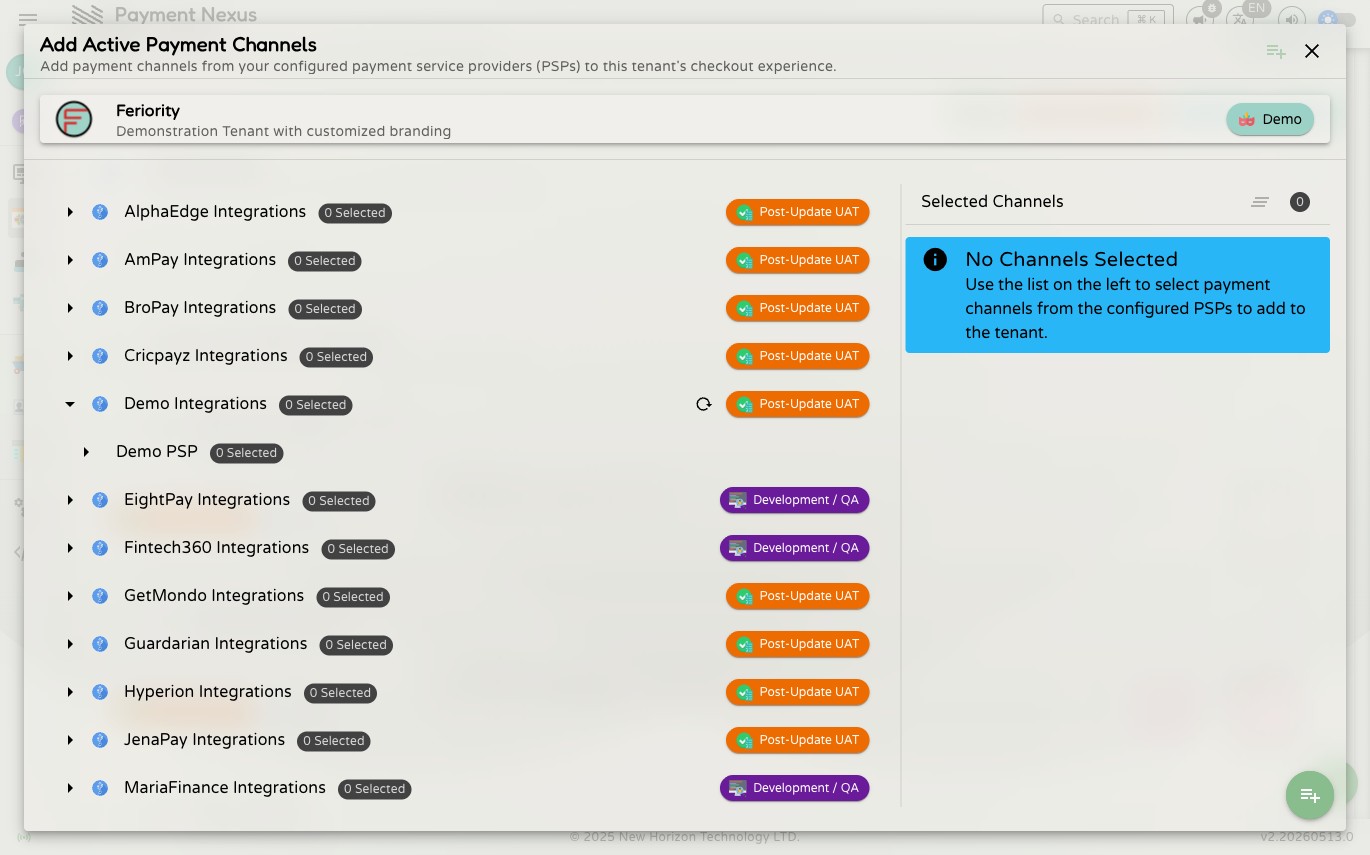
Step 2 — Expand an integration
Click the chevron next to an integration to expand it. This reveals the PSP accounts configured under that integration. You can expand multiple integrations at the same time to pick channels across providers in a single operation.
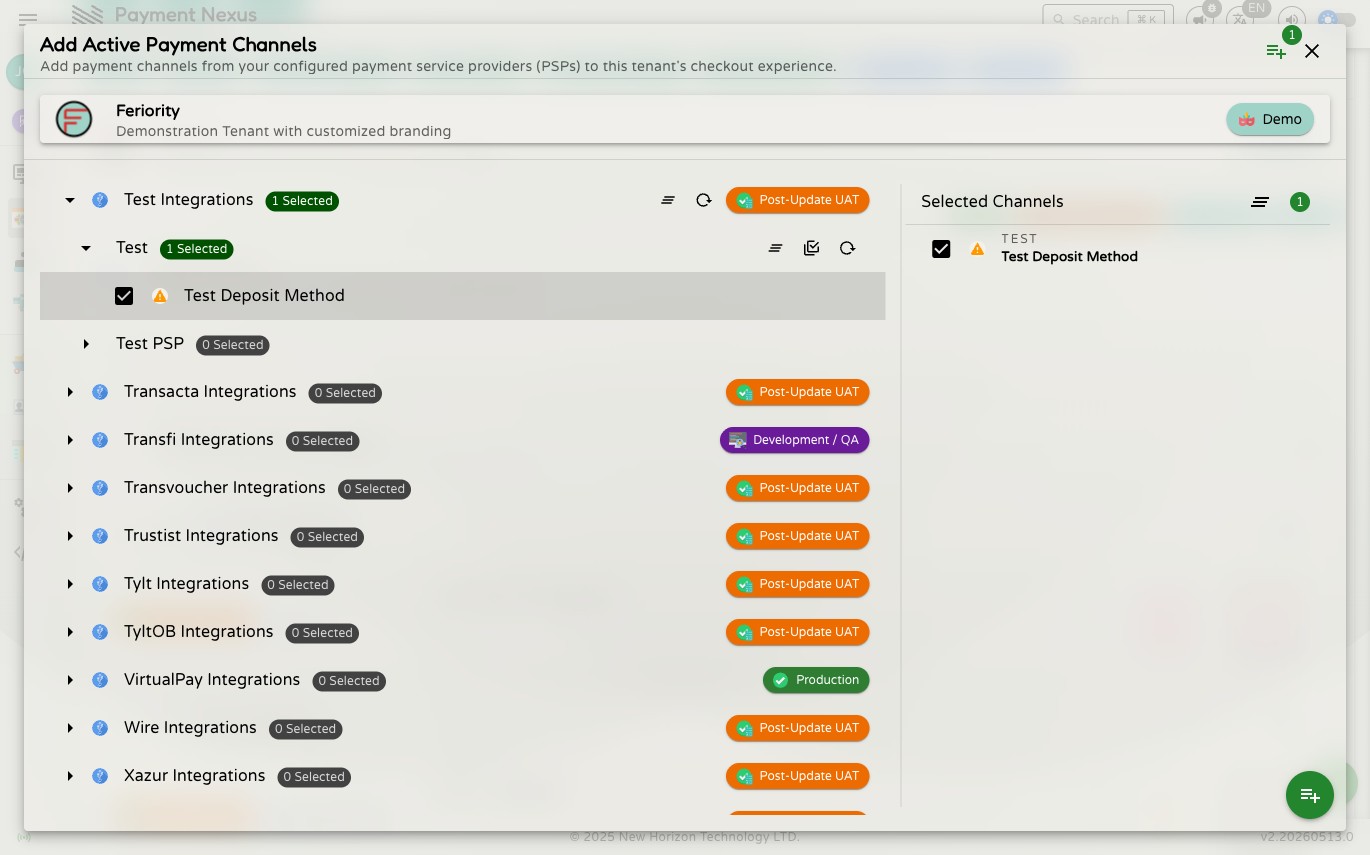
Step 3 — Expand a PSP account to see channels
Click the chevron next to a PSP account to see its individual channels. Each channel shows its type badge and name. Channels that are already active on this brand are hidden — they will not appear here.
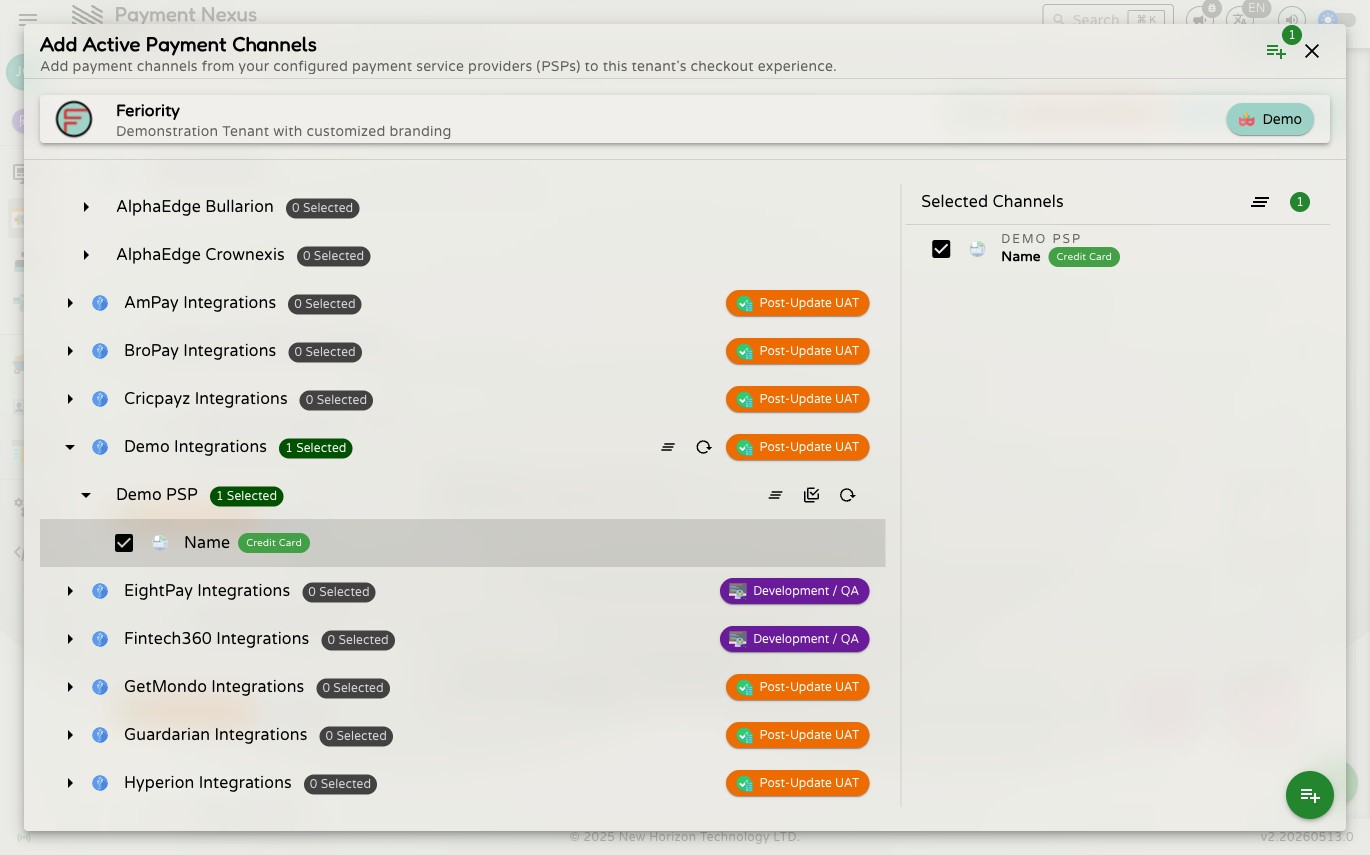
Step 4 — Select channels
Tick the checkbox next to any channel to select it. You can select channels from multiple integrations and PSP accounts in the same session — expand as many as you need and tick across all of them before confirming. The preview panel on the right updates live as you select, showing exactly what will be added. The integration and account rows update their Selected count badges too.
Use the Select All / Deselect All buttons on an integration or account row to quickly toggle all available channels under it.
Step 5 — Confirm
Click the green confirm button in the bottom-right corner of the dialog. The dialog closes and the new channels appear at the bottom of their respective categories, marked as unsaved. The category count badge updates immediately.
Step 6 — Reorder and save
The newly added channels land at the bottom of their category. Drag them or use the Up button to move them into the correct position. When the order and names look right, click Save.
A success notification confirms the save. The channels are now live for this brand's checkout.
Customising a channel
Channel Name
The Channel Name field controls what customers see as the payment method label in checkout. It defaults to the PSP's own channel name. Clearing the field restores that default — it is not saved blank.
Channel Icons
Each channel has two icon slots: Light Icon (used when checkout is in light theme) and Dark Icon (used when checkout is in dark theme). Icons must be square (1:1 aspect ratio). Accepted formats are any standard image type — JPG, PNG, WebP, GIF, and others — but not SVG. Non-SVG images are automatically scaled down to a maximum of 1024 × 1024 pixels before being stored.
To upload an icon, drag an image file onto the upload field or click it to open a file picker. If no icon is uploaded, checkout falls back to the PSP's default icon for that channel.
Ordering channels
Channels within each category can be reordered two ways:
Drag and drop — grab the drag handle icon on the left of any card and drag it to the desired position within the same category. A ghost element shows where the card will land.
Up / Down buttons — click the arrow buttons on the right of each card to move it one step at a time.
The Up button is disabled on the first channel in a category; the Down button is disabled on the last. Both are disabled on a channel that is alone in its category. The ordinal badge updates immediately as positions change.
Order is per-category — each category has its own independent 1, 2, 3 sequence. The order within a category maps directly to the order customers see those options in checkout.
Removing a channel
Click the Remove button on a channel card to stage it for removal. The change does not take effect until you click Save. If you remove a channel by mistake, click Refresh to reload from the last saved state.
To remove all channels from a PSP at once across multiple brands, use the Unlink row action or Bulk Actions → Unlink on the PSP's Linked Tenants page instead.
Saving changes
All edits — adding channels, name changes, icon uploads, reordering, and removals — are staged locally until you click Save. Navigating away without saving discards all pending changes.
Changes apply to new checkout sessions only
Saving immediately invalidates the server-side channel cache for this brand. New checkout sessions started after the save will always see the updated configuration. Customers who are already mid-checkout will continue to see the previous channel list for the duration of that session.
If a change does not appear in checkout straight away, ask the customer to start a new checkout session.