Appearance
Skip to content


Manual Creation
Payment Intent Tickets are normally created through the checkout flow, but operators can create them manually from the management portal. This is useful for testing PSP integrations, resolving edge cases, or creating payments on behalf of a customer outside the normal checkout path.
The creation wizard has five steps, shown as breadcrumb buttons at the top. Each step must be completed in order; you can only advance once the current step's requirements are met.
Permissions
| Action | Permission required |
|---|---|
| Create a ticket | payment_intent_ticket:create |
Step 1 — Select Tenant
Choose which brand this payment belongs to. Type a name in the search field to filter the list, or scroll through the tenant cards. Each card shows the brand's icon and name. Click a card to select it, then click Continue.
A selected tenant is highlighted and the Continue button enables. You can click a different tenant card to change your selection before advancing.
Step 2 — Select Tenant Customer
Choose which customer this payment is for. The step shows a search field — no results are displayed until you enter a search term and press Enter to submit it.
Search by the customer's external CRM ID — the identifier the CRM system uses for that customer. Email addresses and names are not searchable here. If the payment needs to be applied to a specific trading account or sub-account, enter the CRM customer ID and sub-account ID joined with a colon (e.g. 12345:67890).
If no matching customers are found, verify the external CRM ID and try again. There is no way to create a tenant customer from this wizard.
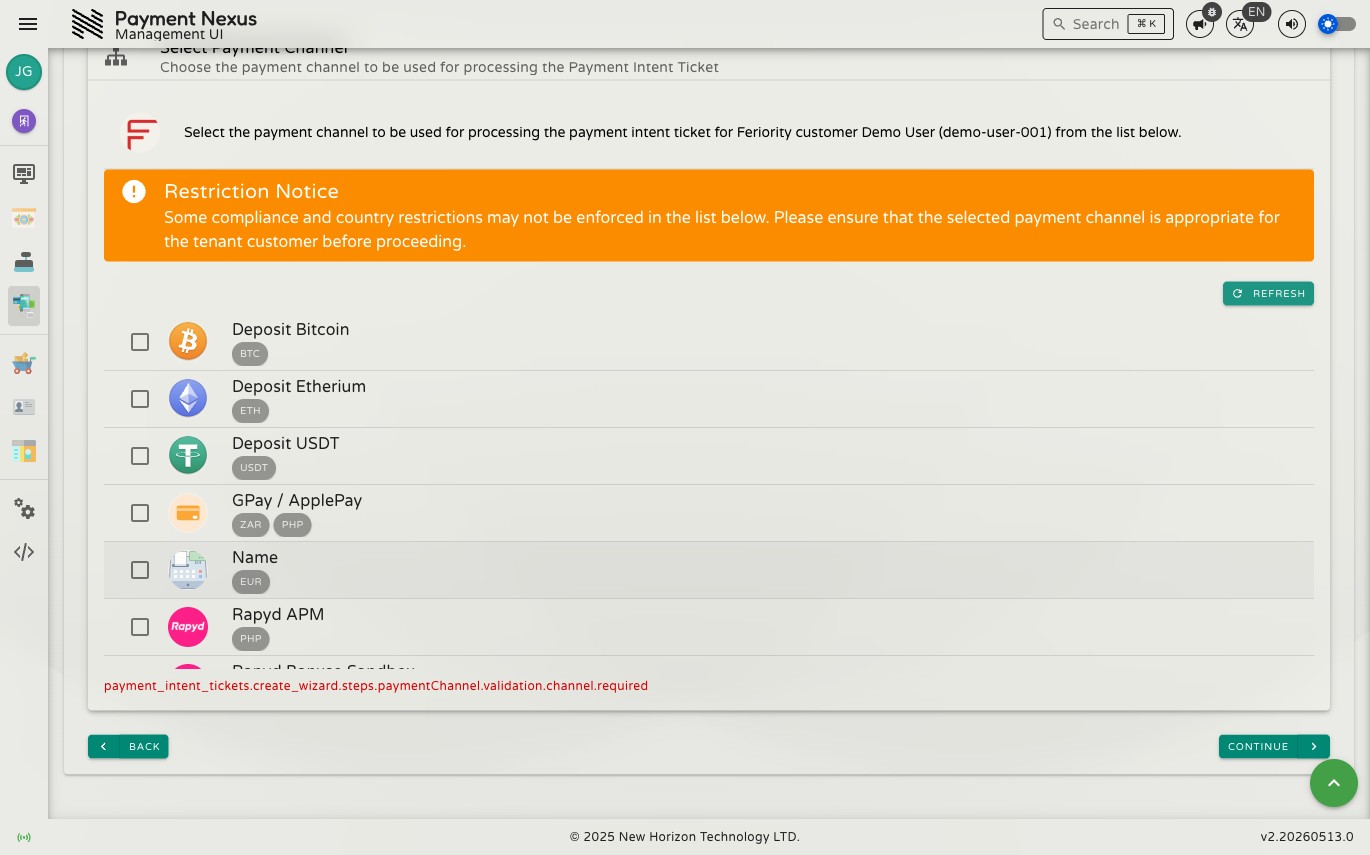
Step 3 — Select Payment Channel
Choose which PSP and payment channel to use. The picker shows all channels configured for the selected tenant. Each channel shows its name and the currencies it supports.
Compliance restrictions may not be enforced
The channel list includes a notice that some compliance and country restrictions may not be applied here. Verify that the selected channel is appropriate for this customer before proceeding.
The channels shown here are exactly the channels active on the brand's Payment Channels page. If the channel you need is missing, you may need to add it there first.
If the tenant has no PSPs linked, or no channels configured, the list will be empty and you cannot proceed. Link a PSP from the PSP's Linked Tenants page, then configure channels for the brand.
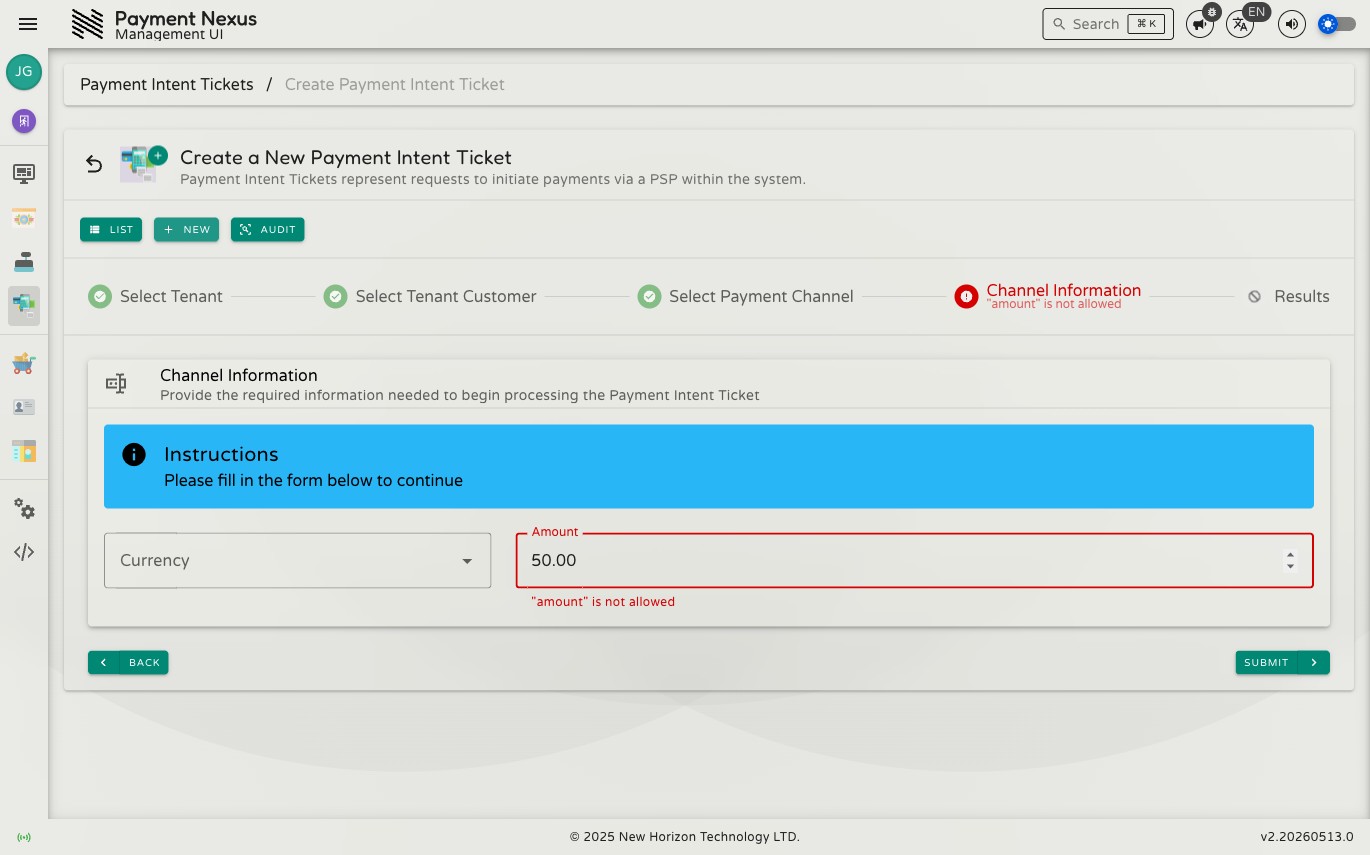
Step 4 — Channel Information
The fourth step is dynamic — the form adapts based on the selected channel's requirements. The channel determines which fields appear, so every payment captures the data the PSP needs to process the transaction.
All channels
Amount and Currency are always present. Currency is a searchable dropdown limited to the currencies the selected channel supports — type to filter the list and click a result to select. Amount must meet any minimum or maximum constraints the PSP enforces for the channel.
Channel-specific fields
Beyond amount and currency, the form adapts entirely to what the selected channel's PSP integration requires. Each PSP integration defines its own field set — this could be anything from a bank reference number and a file upload to cardholder name and card details. The exact fields shown depend on the channel; there is no universal template.
For redirect channels, the PSP collects the payment details on their own page, so typically fewer fields appear here. For inline channels, the form may include additional fields the PSP needs to initiate the transaction.
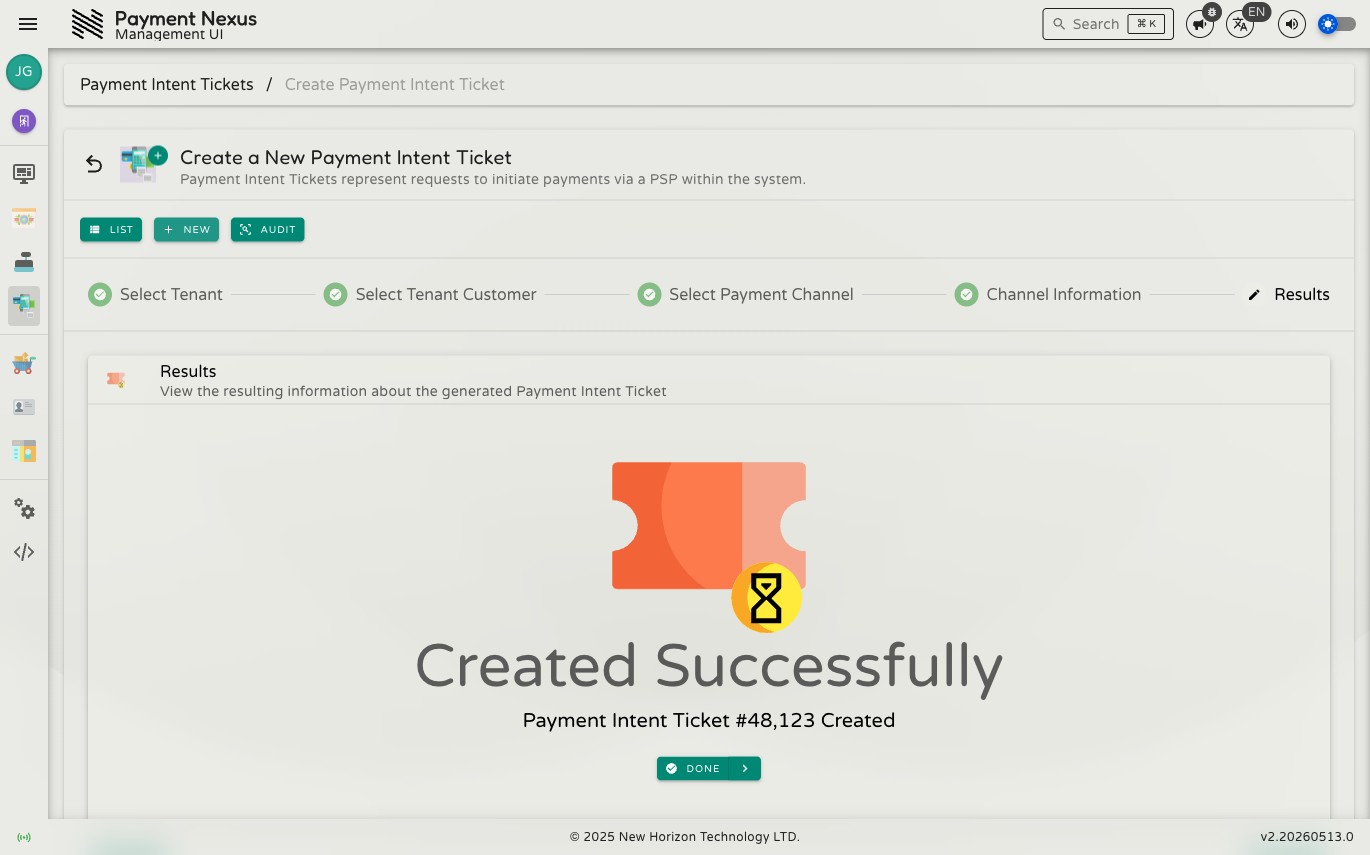
Step 5 — Results
The final step shows the outcome of the creation. Depending on the channel type and the PSP's response, you will see one of:
| Outcome | Meaning |
|---|---|
| Complete | The payment was created and accepted by the PSP. You will see the PIT ID, status, and a link to view the full record. |
| Redirect | The payment requires the customer to visit the PSP's page. A redirect URL is provided — send this URL to the customer to complete the payment. |
| Blocked | The payment could not be created. An error message explains why — typically a PSP restriction blocked the transaction based on the customer's compliance status or country. |
Once the result is shown, click Done to leave the wizard. You can navigate to the new PIT from the directory or use the link shown on the result screen.
Creating a PIT does not charge the customer
Creating a Payment Intent Ticket manually records the intent to pay. The PSP handles the actual charge separately — the PIT tracks the lifecycle of that interaction. A PIT in processing status means the PSP is still working on it; succeeded means the PSP confirmed the charge completed.